Shark Week is not the same as Easter

26 Mar

Rufus the shark has been feeling a bit down lately.

Rufus the shark, all alone.

Easter is coming up, a holiday that is epitomised by rabbits (amongst other things: painted eggs, fluffy chicks, quaint baskets, etc).  Peabody and Emerson have been getting a lot of attention and it has made Rufus realise there isn’t a holiday that he feels a part of.  Peabody and Emerson have tried to help Rufus feel welcome to celebrate Easter with them, and while he appreciates the effort it’s just not the same.  I mean, he knows there is Shark Week, but that’s not very big over here.  And besides, it doesn’t come close to something like Easter.  He has needs too, and they aren’t being met.  He is tired of being misunderstood.  He longs for a family to open their home (and hearts) to him.  But just like sharks, rabbits can be misunderstood creatures too.

Around this time of year it is impossible to move without seeing a cute fluffy rabbit.  They’re everywhere: in adverts on telly and in magazines, on packaging in shops up and down the country, and rabbit-themed merchandise is rife.  It is no wonder that sales of pet rabbits explode at Easter, and pet shops up and down the country have already ‘stocked up’ with baby bunnies to maximise opportunity; it is at this time of year that children beg, nag, and whine to their parents for a lovely fluffy Easter bunny, until they finally give in.

But new rabbit owners often realise they have made a mistake in the weeks and months after Easter when the reality of how much time and money is required to care for their new rabbit hits home.  Rabbit welfare group Make Mine Chocolate! is once again campaigning hard to put a stop to the Easter rabbit impulse buy.  “By asking people to consider a chocolate or toy rabbit instead of a real rabbit at Easter, potential new owners have time to think about the commitment they need to make before it is too late” reports campaign manager Lisa Whitty.

The current rabbit welfare statistics are worsening year on year, with now an estimated 67,000 rabbits passing through rescue each year (RWAF data).  A Make Mine Chocolate! rescue survey revealed that 60% of rabbits entering rescue do so within a year of purchase and it is no surprise to those involved in rescue the main reason being given is the ‘child has lost interest in the pet’.

Make Mine Chocolate! has produced a short list of things to consider before getting a rabbit:

• Accommodation needs to be big and predator proof, with space to exercise and also to stay warm and dry.

• Rabbits need annual vaccinations against Myxomatosis and Viral Haemorrhagic Disease (VHD).

• A rabbit can cost over £1000 a year to look after correctly – and that’s if they stay well!

• Rabbits should live in neutered pairs for companionship and other species are not suitable companions.

• Rabbits can live for 10 years or more.

• Rabbits must eat a diet of mostly hay – a pile at least the same size as the rabbit every day.

• Contrary to belief, rabbits don’t like being handled and are not suitable pets for young children.

So you see, just like sharks (but actually for completely different reasons), rabbits may not be the best choice as a pet for you and your family.  Please consider the commitment it takes before adopting or buying one.  A rabbit that is.  Not a shark.  Although you should seriously think about the commitment (and logistics) if you are considering adopting or buying a shark.  Can you even do that?  I mean, sorry Rufus, you’re cute and all, but I think the whole point of this is that not all animals make great pets, depending on your situation.  And sharks are probably better off in the wilds of the oceans.  Whereas rabbits are best off in a safe and secure home, with someone who understands their needs.

So beware of the Easter Bunny and think carefully before taking on a rabbit as a pet, and if you are going to buy one, then think about going to your local rescue shelter first.  Good rabbit rescues are a great place to learn about caring for rabbits correctly, and can often offer advice on their life-long care.

We recently adopted two rabbits from a local rescue centre and while they are a glorious addition to our home, I completely support everything that Make Mine Chocolate! are about.  In the short-time that we have got to know Peabody and Emerson I have learned a lot about rabbits as a species, their individual personalities, and the level of care, vigilance, and commitment it takes to provide fully for them.  And even despite the best level of care and concern, we have already had to visit the vet practice once for a case of bunny illness (and yes, we also pay for rabbit insurance, so add that to the list of costs).  They are wonderfully intelligent creatures, who are a joy to watch and interact with, but they certainly aren’t for everyone.  I hope this has given you some helpful information on a subject I think is incredibly relevant this week and coming weekend.  If you know someone considering a rabbit for Easter, please pass this along so they can make a fully informed decision before bringing one home to join their family.

Happy Easter!

Peabody, Emerson, and Rufus together for Easter.

Alison (and Peabody and Emerson and Rufus)

Manchester Day Parade

10 Jun

This afternoon Ian and I went to Manchester to see this year’s Manchester Day Parade.  If I am being perfectly honest,  the whole reason I went is because it had this on the poster – which made it look like the fun-est, geek-iest, steampunk-iest parade ever!  We drove into Manchester (well, Salford Quays) and then took the tram in, which avoided us having to try and park in downtown Manchester while half the roads were blocked off (and happily it was also just as quick as getting the train in on a Sunday).
It was a super neat afternoon!  I really like parades and frankly, I don’t think there are enough here in the UK.  I am really glad that the Manchester City Parade has become an annual event (it only started in 2010).  I shall definitely be going again!

While I was there I took about a million photographs, so I thought that I would enter their photo competition for amateur photographers (because yeeeah, I most definitely fit the bill).  I can submit two entriess and the winning photographs are meant to capture the size, vibrancy, colour and movement of the parade against the backdrop of Manchester City centre and the large crowds expected.  I’ll be honest with you now, my chances of winning are pretty slim; there were a lot of people there taking a lot of photos (most of which I expect will appear as entries in this competition).  But hey, it’s a bit of fun!  : )

I am uploading ten photographs below and I would really appreciate your opinion on which ones you think I should submit to the competition.

Please vote using the poll below the photos – it’s simple, just choose the ones you like the best!  You can vote for up to three and once the voting is complete I will select my entries from the photos that received the most votes.  The deadline for your voting is 17:00 Sunday June 17th (so that I have time to submit them to the actual competition).  If you want to let me know anything extra about your choices you can use the comment section at the bottom of this post.

And now… to the pictures!

He was definitely one of my favourites!

#1. Golden Bug Man

I took about a billion pictures of this from various angles.

#2. Butterfly Shadows

I waited for ages for this Devil to turn around to face me when I finally realised it was perfect that s/he wasn't!

#3. Captivated Audience

She was lovely, just lovely.

#4. Quite the Bride

It was absolutely fascinating to watch the enormous marionettes interact with the crowds.

#5. Hello Dear

This group was the definition of adoreable!

#6. Up, Up, and Away

I finally managed to tell the difference between the signs that said 'arts' and 'rats', by the time this group came around. :)

#7. Rat Race

This was just too perfect - and all the pilots pretending to be planes was brill too!

#8. Pilot Envy

Impressive. Mad. Skills.

#9. Flying the Flag

So many colours! And the bees? Squee!

#10. Cute as a Bug’s Ear

In addition to the above, I also took a lot of other photos today that I really like, but they don’t necessarily reflect the traits sought after for the competition entries, so… after all of this done and dusted I will do another blog post with some of my favourite pictures.  Yippee!

Well, that brings today’s post to an end.  Thank you for taking the time to check it out and thank you for voting!

Over and out.

Forget-Me-Not

10 May

On my walk to the train station yesterday I passed through the wood near our house and it was filled with forget-me-nots in full bloom.  It turns out their name is more appropriate than I had previously given it credit for.  As I walked down the path, the air warm, fragrant with the smell of Spring blossoming, the flowers swaying in a gentle breeze, and the sun peeking out behind the clouds, a memory was conjured up from the depths of my childhood in River John.

I am not sure how old I was, but I must have been five or younger.  My mother had gone to the shop and taken us with her for one reason or another (in this particular instance I think it was my brother Ryan and I).  We parked near the shop and she went into the Co-op and specifically told us to stay in the car.

But, while she was gone we sneaked out of the car and into the lot beside the shop.  We walked through the unkept greenery and trees and began to pick handfuls of forget-me-nots; pink and purple and blue… but mostly blue ones.  We gathered our handfuls together into a bunch and placed them on the steering column, for my mother when she got back into the car.  Then we got back into our seats and pretended like nothing had happened.

I am not sure what happened next, but I do have a vague memory of my mother getting back into the car, seeing the forget-me-nots, then presumably (rather quickly) deducing our actions, and turning around to smile at us in the back seat.

What strikes me most about this memory is not that it was so abruptly brought to mind when I saw the flowers yesterday morning, or even that I remembered it happening so clearly*, but the sensation that I get when I cast myself back into that memory; the feelings of being five years old again and taking part in a secret act to surprise my mother – the pure joy of knowing that despite my actions being in direct disobedience to her instructions, it was for the best of reasons and therefore it was terribly exciting, fun, and right.

*And if this memory turns out to be untrue (I am never sure if I can trust the memory of a five year old, let alone the memory of a five year old after twenty years have passed – maybe it never happened, maybe I have got all of the details incorrect, maybe…), it doesn’t really matter to me, because I know that yesterday morning for a few minutes while I walked through the woods I felt like I was five years old again and all that mattered was that I was going to let my mother know I loved her.

Happy (early) Mother’s Day Mum.

I love you.

Complete: Wedding Cake Test-Run Two

2 May

Alright, so I haven’t posted much about my various cooking/baking adventures lately, but the wait will have be worth it (because in my mind, you’ve all been waiting with bated breath for my next post).  In case your interested, I also have another blog ‘From Here to Here‘, which is a bit more (and I stress a bit more) educational.  Because it seems that here, at ‘Osteo[pun]’ I seem to have diverged rather quickly to posting about various pies, cakes, biscuits, and other edible items, where I said that initally this blog would feature all manner of distraction.  But this is only because baking/cooking is what I most often use to distract my mind completely from my research. And I say most often… because in a few days, I will have another very fun post to share with you.  But right now it’s still a secret!

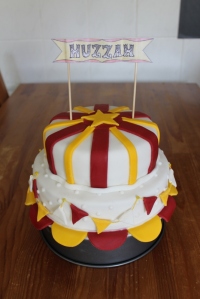
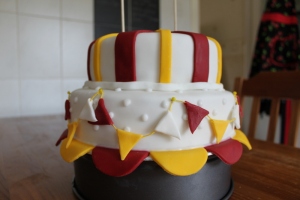
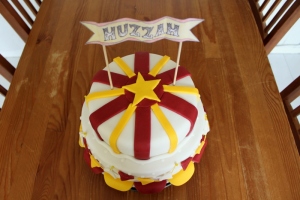
And now on to today’s post: Wedding Cake Test-Run Two.  You may remember (but if you don’t the link is coming shortly so you can read the back story) that a couple of months ago I performed Wedding Cake Test-Run One, in an attempt to discover if I could successfully use sugarpaste to decorate a cake (and successfully in this context means being able to decorate a cake to a standard acceptable for a wedding).  Well, it turned out to be a great success!  A great delicious success!  I learned a lot in the process and decided that the next test run would be to determine whether or not I could make a tiered cake without it collapsing.  I mentioned to my friend Sara (one of the to-be-weds at the wedding in question for which I am preparing this cake [and I’m aware that was a mega awkward sentence, but I am too lazy to try and figure out a better way to write it]) and she let me know that they had chosen a theme/concept for their wedding, all around the circus/fairground.  What a super neat idea for a wedding!  It immediately brought to mind a lot of really fun things you could do with a cake.  I did a few searches for some inspiration and one issue that immediately came to mind is that if you go too circus-y, it just ends up looking like a cake for a kid’s party.  I decided that I needed to pick out some strong features (colours, patterns, etc) and use this to create the circus-y feel, but still keep the cake looking wedding-y.  And so, Test-Run Two not only became a test for making a tiered cake, but also using sugarpaste on sugarpaste decorations, since I had never done this before.  I even used colours (and nice colours too, not like the mega ugly yellow from my first test-run)!

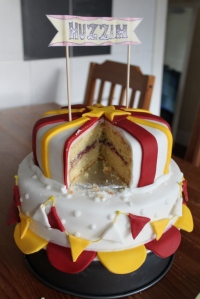
I learned a lot in the process of decorating this cake, so I know a few things that I would do differently next time, but all in all it went really well.  I drew up an illustration ahead of time and worked out the measurements for the decorations, which was something I had figured out from the last time – go in with a plan!  And then I baked!  I made a mutated Victoria Sponge cake, with blackberry jam.  And then I iced!  I used a simple butter frosting to smooth over the cakes and even up the edges.  And then I covered in sugarpaste!  I rolled out the sugarpaste and covered both the top tier and bottom tier and left it to harden over night.  And then I decorated!  This was the bit that involved the learning curve.  I am not going to go through this test-run step by step like last time – but if you have any questions about the step by step process, just ask me in the comments.  I’m simply going to post lots of pictures of the final results and you can all let me know what you think.  Any feedback is appreciated (but kind feedback is more appreciated).  You can hover over the photos for extra comments, if you feel like you need some guidance!

Huzzah!  Cake!

Look!  Tiers!

I wanted to lick it so bad!

And there's even a star on top!

Ta da!

Tiers

Bottom tier: dots and bunting!

Top tier: stripes and star!

A view from the top.

Huzzah indeed!

I made this sign by hand and I am super proud!

Look!  You can see the inside of the cake!

That is the cut-out for two slices, just in case you're judging.

It wasn't there for long.

Sara came over this afternoon to see the cake (and taste test it too).   It was super yummy.  Obviously the flavour options are pretty much endless for their actual wedding cake, but I was very surprised by how much I enjoyed the blackberry Victoria Sponge instead of the traditional strawberry or raspberry – it was quite different!  We also had a good talk about ideas for the actual wedding cake: colours, decorations, tier styles, sheet cakes, logisitcs, etc!  And now we have a good idea of what I will be doing for the final cake.  The next step is that I am going to draw a few designs out based on our ideas and then Sara and Will can choose which one they like best!  Oh and of course Will gets to taste test the cake too, since I sent a piece home with Sara – so it will hopefully get the full approval by the end of the week and then we can sign the contract (by which I mean, them saying, yeah, go ahead, make our wedding cake).

Can you believe they are trust me with such an important thing!?!

It’s going to be so much fun!!!

Complete: Wedding Cake Test-Run One

5 Feb

I have been lacking in posts recently, mostly because I have been poorly for a while and so have not completed many fun projects in the past few weeks.  However, I made up for *all* of that with this one super fun project!  Our friends are getting married this year and when they came over for a visit a few weeks ago and the conversation moved on to their wedding plans, I (awesomely) (stupidly) decided to mention that I was going to try making a fancy cake soon (daaamn you Ace of Cakes, piquing my curiosity).

I also mentioned that if this attempt went off well, then I could make them a wedding cake as a present, if they wanted (and trusted) me to do so – for one of the most important days of their lives.  Bless!  I decided that it would be better to try a test-run sooner rather than later, so they could decide sooner rather than later if this could actually work.  I shall work through my weekend process in steps below, but if you are really curious I’ll let you know now… overall result: not so bad!

Step 1: Start with a nice and tidy work station, with all of the tools you shall need to bake a cake!

But not for long, muah ha ha ha!Step 2: Zest, zest, zest… lots of zest.  Why?  Because I made a lemon sponge cake, with lemon syrup drizzle!

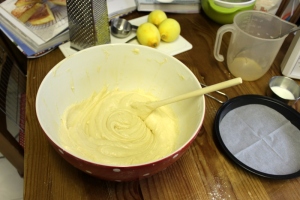
Lemmmonomnomnom.Step 3: Make yer cake batter.  I used a recipe for a lemon drizzle cake from one of the Great British Bake Off recipe books.  I wanted to make a lemon cake, but I also wanted a nice dense cake to work with, to minimise how much it crumbled and how much it would compact under the weight of sugarpaste (having never used it before, I was going for fool-proof).

Lemon drizzle cake recipe (Great British Bake Off w/ alterations).Step 4: ‘Make’ lemon drizzle syrup (sugar, lemon juice, lemon zest).  I could have just drank the whole bowl.  I settled for a teaspoon though.

Step 5: After the cakes were baked and cooled, I evened off the tops and then liberally applied the lemon drizzle.  I think with deeper cake pans, this could (largely) be avoided.  But hey, you work with what you have.

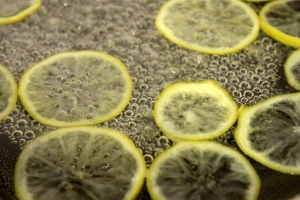
Step 6: Because I was not going to start the next part of the cake making (constructing and decorating) until the next day, I decided it would be an awesome idea to try and make candied lemon slices, since I had loooads of lemons in the house.  I followed what appeared to be a pretty standard internet-wide recipe: boil the heck out of lemon slices, plunge in ice bath, simmer for ages and ages in a sugar water combination, let cool on a parchment covered wire rack.

Yum?Step 7: While the lemon slices are cooling, play around with sugar water combination that you have put on high heat on the hob and make various hard candy disasters and stick everything in the kitchen together. Don’t burn yourself… feel awesome.

Not your average old people sweet!Step 8: Oggle your pretty creations.  Try to convince your stupid brain exactly how molten hot these slices are, to avoid picking them up (again) with your fingers (and trying to eat one) (again).

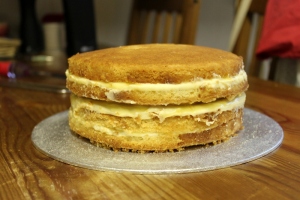
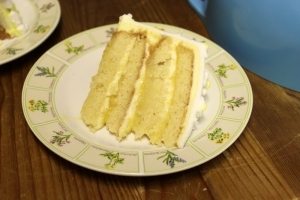
Sugary lemony bittery deliciousness!Step 9: Sleep (because this was all done late in the day, begin again the next day.)  Delicately cut the two sponges in half (hahaha, what was I thinking, they are sooo thin) then layer between each lemon curd and a lemon cream (whipped double cream, marscapone, lemon curd, and lemon zest).

It needs a little trimming! :)Step 10: After refrigerating to help solidify the layers, ice with lemon buttercream frosting to smooth it out, fill any gaps, and give a surface for the sugarpaste to stick to (something that is recommended on many instructions).

And now it is a little more even(ish).Step 11: Forget to take a picture of it when it is just covered in plain sugarpaste, with no decoration.

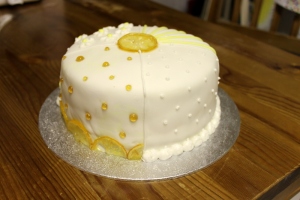
Step 12: Decorate!  I divided the cake into four, as I wanted to try different styles and techniques of decoration.  Side 1: Dots!

Dots, dots, dots.Side 2: Stripes!  I think it looked nicer with only the white stripes, because although the picture doesn’t show it, that yellow icing is a mega-ugly colour… I am going to have to play around with the colour options.  A drop of red might make it a bit of a nicer yellow, less harsh.  I think the next time I will try to do sugarpaste stripes though, of varying widths, instead of piped icing stripes.

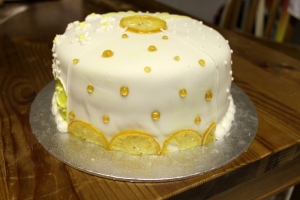
Stripes, stripes, stripes.Side 3: Candied lemon slices with sugar dots (obvious hint: lemon slices are covering up the one sugarpaste smoosh I made).

Lemon slices and sugar dots.Side 4: Hideous decoration.  What I learned: don’t paint really flourescent yellow colour directly onto sugarpaste, because you can’t get it off, get a finer piping nozzle because the no.2 isn’t fine enough and looks like a child decorated your cake, practice daisies on a board before doing them on cake, don’t free-hand a cake (quarter) on your first go… have a design drawn out.  But despite all that, meh, I guess it’s not so bad.

Eww, ugly piping decoration!Top: It looks a bit manic when you can see all four designs at once!

Topsies turvies (spelling much)?Step 13: Clean up the massive mess you’ve made all over the kitchen (sugarpaste, food colouring, royal icing, powdered sugar, etc).  Cut into the glorious creation that is cake in order to complete the mandatory taste test!

Nommm!Step 14: Admire. Eat. Feel slightly ill, because I’ve only just finished a huuuge piece of pie for my tea.  But you could theoretically eat your slices of cake when you’re not already hugely full.  However, it’s awesome with a cuppa.  I’m just sayin’.

It was gone so fast!Ian and I both agreed that we liked the various dot sides best – they looked elegant and simple – and bet they’d look good over an entire cake layer.  Any thoughts?

Dots and sugar dots!I think this was a pretty good result for my first go making a ‘fancy’ cake (ie, using sugarpaste).  I can already tell that if I had any of the right equipment then it would have been waaay easier.  For starters, I didn’t have a big enough rolling pin for the sugarpaste so it was tricky to get it all rolled out, no spacers to get it rolled evenly so I substituted 4mm knitting needles, no sugarpaste smoother so replaced with a hand (my hand), etc… it is a good thing that improvising kind of works in the kitchen (if you are not fussed on not having a perfect cake).  I also think that I would make royal icing fresh, as the stuff I was using was from a batch I had made a while ago and the texture wasn’t great, but that was just me being lazy towards the end of the process.  I could go on and on about all the lessons I learned from test-run one, but that would be boring.  Buuut, the next time I make a cake, I will know what to do to make it even awesomer!

Yeah!

Sorry for the crazy tense-shifting instructional style of this post, it’s late, and I’m tired, and thirsty.  Oh, Ian just brought me a glass of water.  I’m only tired now.

The Word That Matters

17 Jan

I posted this very quick opinion piece on my Facebook account earlier.  I wanted to share it via the more public Twitter-sphere, but I shan’t be expanding on it further, unless demand requires it.

I read this news story on the BBC this morning: Aardman trailer ’causes offence’ to leprosy charity. It has been causing quite a ruckus on the interwebs, more ruckus than it deserves.

Now, I’ll be honest, when I watched the trailer (You can watch The Pirates! movie trailer here on the official website.) I laughed. Why? Because it’s funny. And I’m not ill-educated about leprosy. In fact, I know shit loads about leprosy, as someone who studies osteoarchaeology.

I can sort of see where they’re coming from, but I think they’re going at it all wrong. I tweeted about it to Lepra Health in Action saying, “@LEPRA_HinA can use this opportunity to educate about #leprosy. The #Aardman ‘controversy’ has put your charity in the limelight. #notsobad” And to be fair, they retweeted it – but I think they might believe I’m a huge supporter of their cause (re: what Aardman did was wrong). And I’m not.

Their chairty is doing good (and needed) work to raise awareness of a pretty awful disease, but seriously, if peeps are going to get all pissy about things like this, than the next thing you know the physicists are going to be in a huge uproar about how misrepresented the laws of physics are in animated childrens’ movies (as demonstrated by the frankly absurd antics of the whale in this Aardman trailer) and it is going to be setting back years of science education in schools. My opinion (take it or leave it): have a sense of humour Lepra and use that sense of humour to spread the word that matters.

Holiday Noms

31 Dec

I made a few select holiday sweets this year, which I have not posted about until now because they were given as gifts and I wanted to keep it all a bit hush hush.  However, I am so proud of them that I shall share them with all of you lucky folks now, just in time for the New Year so that you can begin planning for next year.  Hahaha!

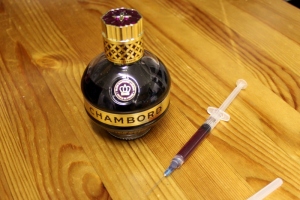
I will tease your imagination and senses by first showing you a picture of the most fun kitchen implement – the syringe!  I used it to (attempt) to fill some of my chocolate-raspberry truffles with Chambord.  It worked okay, but it would work better if I planned ahead and left a tiny space in the centre of the truffles, in order to increase the booze to truffle ratio!  I did not take any pictures during the ‘making of’ process, but it was easier than I expected for my first try.  I can post the method if anyone likes (which reminds me, I have to send a pie recipe from an earlier post to a friend still… damn my awful memory… but yay for actually remembering now – better late than never).

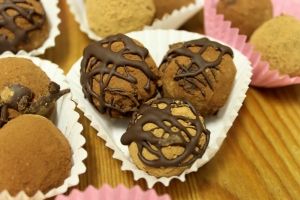
The best kitchen tool... a syringe!All of the truffles I made were the same delicious flavour (chocolate-raspberry), but I had plain coated ones (dark or semi-sweet cocoa), chocolate drizzle ones, and extra boozy ones (in the pink papers, to distinguish).  They were MEGA-chocolatey, so I am glad that I made them relatively small (three of them fit comfortably into a fairy-cake paper).

They look like fuzzy little teddy bears... delicious teddy bears!The chocolate hardened nicely, but I think next time I would try tempering it to get a nice shiny gloss, like the pros do, you know?

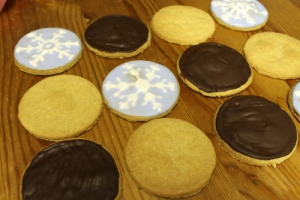
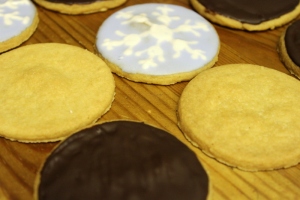
Does it get any better?I also made shortbread.  Shortbread is like the simplest cookie ever, but I had real difficulties being confident in mine.  I guess when a recipe has less ingredients (three in this case) it is even more important to get everything just so, in order not to screw it up.  I made mine a little thin, which didn’t bother the taste any, but the texture was better for tea-dunking than just nomming.  I decided to mix up the gift biscuits by making some chocolate coated ones and some royal iced ones (with little snowflakes, ooo).

Plain, chocolate, and iced!This one here is a close-up of my mad skills.  Although that was not perhaps the best snowflake I accomplished, I swear!

There were a few pesky air bubbles that surfaced!Next is a picture of the already seen gingerdead men.  I used a cookie cutter and then a stamp on the reverse to push in the skeleton design.  I then used royal icing to pipe their little bones, which was harder than I expected, but made easier by my slightly gloopy royal icing texture.

Teeheehee!I also made little personalised (roughly) gingerbread men (or people, if you are über PC) for some now extended family members of mine (I am not sure what the right terms are, as I don’t think you use aunt/uncle/cousin-in-law).  I even made some little Christmas accessories, like hats or baubles!  The first batch went to the various Boageys/Thompsons.

The second batch went to the (other) Atkins!
And the next holiday meal is tonight, for New Year’s Eve (I like that I just though of all the above treats as a meal, hahaha).  We shall be having Greek – various mixed vegetable skewers, chicken and prawn marinated skewers, potatoes, haloumi, and salad.  Sadly, I did not make any desserts, but we have loooads of chocolates and biscuits in the house, so I figured they’d do (although no more of the above pictured sweets, as we have already finished all of the ‘testers’ and ‘extras’.

Pudsey Cake

17 Nov Ta-da!

I spent a part of this afternoon and evening making a cake for a Children in Need bake sale tomorrow at Ian’s work.  If you aren’t from the UK, Children in Need is the BBC’s charity that helps disadvantaged children and young people across the country.  Once a year in November there is an appeal show to raise money for the charity, with celebrities singing, dancing, and doing all sorts of things.  In the build up to the live appeal show there are loads of activities and events that happen all over the place… including things like this bake sale!  You can read more about Children in Need here, if you have a few minutes spare.  And now, the picturepalooza of my cake-making process and all of its beautiful disorganisation!

I used a new recipe this time around for the cake batter, but only because I couldn’t find my Mum’s recipe.  I know it is in my e-mail somewhere, because she sent it to me in January 2009.  Yeah, that’s right, I have a memory, too bad it doesn’t extend to where I put the recipe or the e-mail with the recipe attached to it.  I made a few alterations to this new recipe (less sugar, more cocoa) because I prefer my cakes richer and not so chocolate-y sweet.

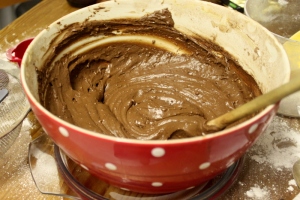
A great big bowl of delicious cake batter!

The batter ends up quite liquidy at the end, because you add boiling water to the mixture to keep the cake nice and moist.  It literally pours into the cake pans!

This is my favourite baking item, thanks Andy and Adela!

It pours so quickly, because it is so liquidy, that I actually slightly over-filled the cake pans for the first round of baking, but it isn’t really a problem (as you will see later).  I figured it was better to deal with slightly bigger than desired cakes than to try and remove liquidy batter from cake pans back into the mixing bowl, which would have ended in disaster.

I may have slightly over-filled the cake pans for the first round of baking.

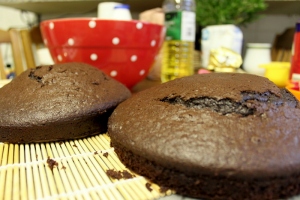
I baked the cake for about 30 minutes on 160°C.  Because I was baking two at a time, they ended up a tiny bit wonky as the temperature in our oven isn’t even throughout (but again, not a huge deal).

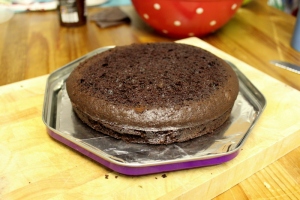
Pavlov's dog would have drooled.

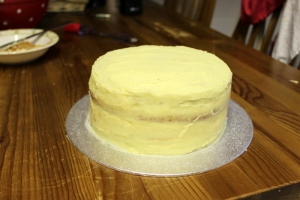
Next, I made the frosting (or icing).  I made a chocolate butter cream, again, slightly changing the recipe to include more cocoa, because originally it just tasted like powdered sugar – more like a royal icing than a buttercream frosting.  It is delicious and cocoa-y now though!

Cocoa buttercream frosting!

After all of the cake layers (I baked six in total) were cool, it was time to assemble the cake.  The first and most important step is the cup of tea to keep the star baker going!

Work...

The second step was to remember to take the sheets of greaseproof paper off the bottom of the cake layers.  I don’t normally use greaseproof paper for something like this, but because I was having to use the same cake pans multiple times in order to get all the layers done (two pans, six layers, you do the math), it meant I could remove the cake from the pan without it being entirely cool, but not have to worry about the bottom sticking to the pan.

Step 1: Remember!
After that, I had to even up the wonky cake layers so that they would sit right for the final product (otherwise the entire cake would end up uneven and fall apart, which is not the best way forward).

Step 2: Even

But like I said earlier, it isn’t a huge deal, because one) it is really easy to do and two) it means you have extra bits of cake that you can eat right away (Ian especially liked this step)!

3: Extra Bits

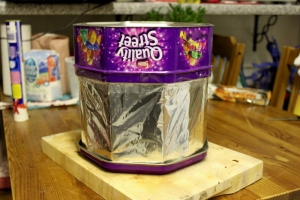
I decided to use a Quality Street tin from last year for putting my cake in – it has the right size base (lid) and it isn’t a massive problem if I don’t get it back – because let’s be fair, we’ll have another fifty million in our house after next month, like every other person in the UK.

Step 4: Base

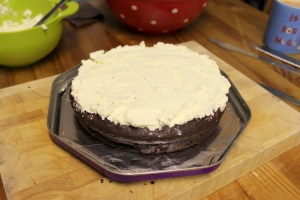
The first layer of filling to add was a layer of cream.  I used hand whipped double cream (mostly because I was too lazy to get the food processor out and there was only a little bit of cream to whip), unsweetened!  I never add sugar to my cream for dessert, because I find it makes the whole thing overly sweet, which isn’t nice.

Step 5: Cream Layer

Then, and this bit is important, add the next filling layer of fruit (raspberry conserve in this case – and conserve always, not jam or jelly, because again it is less sweet – the tartness is delicious again the cream and cake) to the bottom of the next cake layer!

Step 6: Fruit Layer

Then you simply stack the cake layer on top of the bottom one and begin the process again!

Step 7: Stack (Carefully!)

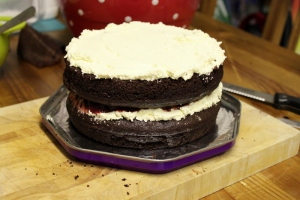
And voila, three cake layers, stacked, with cream and raspberry between both layers!

Step 8: Repeat

I then used my frosting, which was now a good texture (although it did need mixing once through before using) to make my cake look super professional, by filling in all the gaps and uneven bits with delicious cocoa-y goodness.  The key is to make sure you put lots of frosting on your knife and apply generously to the cake before trying to spread it – if you are too conservative you’ll just end up tearing the cake and ending up with all those little unattractive bits of cake floating in your frosting.  I mean, it’ll still taste awesome, but it’ll look messy.  Well…  more messy.

Step 9: Make it look professional, through the means of filling gaps with frosting.

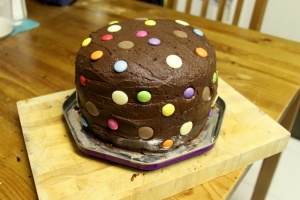
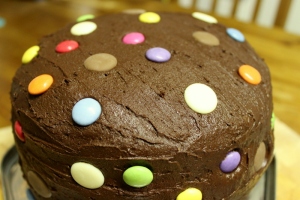
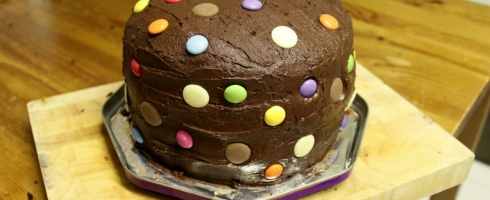
Then, because it was for Children in Need I added some polka dot decorations!  I used Chocolate Buttons, Milky Buttons, and Smarties.  I am sure they will all have fallen off by tomorrow morning, but it’s the thought that counts.  Again, if you aren’t from the UK…  Pudsey (the bear mascot for Children in Need) loves polka dots!

Step 10: Decorate appropriately (Pudsey loves polka dots).

Look!  With a clean table behind it, it looks like of pretty.  Or maybe cute.  Yeah, it’s a cute cake.

Ta-da!

How pro is that finish people?  Just look at it!  But not too close.  Let’s keep up the illusion that I am a master baker.

Polka dots!

Now, I did come across a tiny problem, which was since I made a massive three layer cake, the Quality Street tin lid (base) was now way too small to consider using it to contain the cake… on its own.  I improvised with some cardboard and made it foodgrade by covering it with aluminium foil and then fixing it to the Quality Street tin!

The Quality Street tin wasn't *quite* high enough to cover the cake!

It’s a perfect fit!  Just don’t be surprised if the edges of the cake are a little smooshed when it comes off at the bake sale table tomorrow.  And you know, don’t let anything hit the side, because it’ll collapse and crush the cake.  Also, when you carry the cake, be sure to hold it even from the bottom, otherwise the cake will tip over and because the lid isn’t fixed to the base, the whole thing will fall off.  But you know, other than that… it’s perfect!

It's like magic!

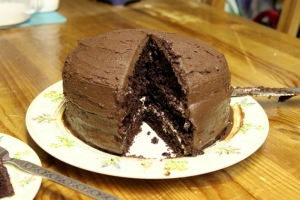
Now, if you’ve been paying attention, you will have remember previously I said that I made six cake layers.  But I’ve only used three so far, for the Pudsey cake!  So what did I do with the other three?  Well, once people learn that you are making a cake, they want some.  But if it is for a charity bake sale I can’t really send it off to Ian’s work with a few pieces missing.  Therefore, I made another (smaller) version of the same cake (minus the decorations).  Voila!

Practice makes perfect... maybe I should have practiced with this one first!

This one also looks pretty good.  I think maybe I should have made this one first, in order to practice before making the Pudsey cake.  But this one was also easier because the cake layers were smaller.  However, it is less cute.

What a lovely little cake.

Despite it being low on the cute scale though, it was pretty high on the delicious scale.  I had a normal sized piece, to test it out.  Ian only had a little piece because he was already pretty full from all the extra bits of cake I gave him earlier!

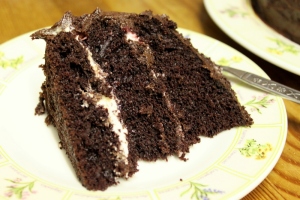
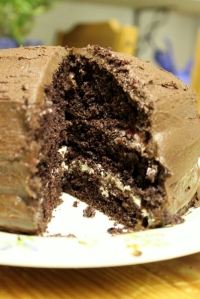
Triple layer chocolate cakes *always* look good.

The first piece is always a little messy when it is served, but this one didn’t come out too bad, if I do say so myself.  By tomorrow, all of the layers will have settled a bit more, which will help too.  However, the cake itself came out so light and fluffy and moist.  I will definitely use that (modified) cake recipe again!

It's a little messy, but hey, who cares?

This last picture is my pro shot, like if I had a cafe, I would put this picture in the window to entice you all in through the doors to buy my cake at an extortionate price.  How much would you be willing to pay?

It looks like a 'rustic' pro cake.

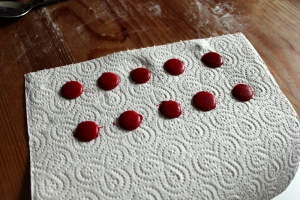
As an aside, when I was planning this Pudsey cake, I decided I wanted to put some polka dot decorations on it.  However, for whatever reason I was having a really hard time coming up with what I could use for the coloured polka dots.  I knew that I could use Chocolate Buttons for some brown dots and Milky Buttons for white ones…  but what about all the other colours?  I actually wandered around the grocery store for ages, up and down the home baking aisle and then up and down the confectionary aisle before I finally thought, maybe I should stain some Milky Buttons with food colouring.  When I asked Ian later on if he thought that would work, he said, “Why don’t you just use Smarties?”  Then I felt like a bit of an idiot, because that should have been really obvious, but then this afternoon I was curious to see if you even could stain Milky Buttons with food colouring.  So obviously, I tried!  I used a paintbrush to colour them over with the food colouring, and because I only had red in the house, it looks like I tried to kill something in the next picture…

Muahahahaha!

Then I blotted them off and it had kind of worked, but they were still white in places, so I repeated the process and it worked pretty well after that!

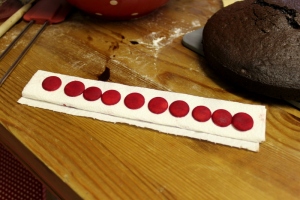
Dots, dots, dots...

Once they dried out, the colour came up pretty good.  But I tasted one and because of the amount of food colouring I had to use to get the colour to ‘stick’ they ended up tasting pretty bitter, so I decided not to use them.

But are they edible?

But, if you ever need some edible chocolate (if not entirely tasty) polka dot decorations in colours other than brown and white and for whatever reason you cannot get Smarties, then it totally works (with some patience).

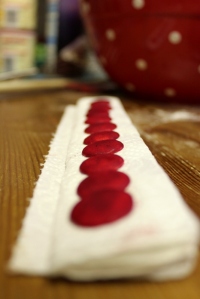
All in a row, little e-number dots.

Delicious Request Pie

13 Nov

Tonight I made a pie.  I have made this pie before.  And before that.  And then only once before that.  This pie is popular in our house.  Especially with Ian.  After I made it the first time he said that I would make it again.  It didn’t really sounds like a request, more of an order actually.  But henceforth it shall be known as super delicious request pie.  And commence pictures for ya’ll to drool over!

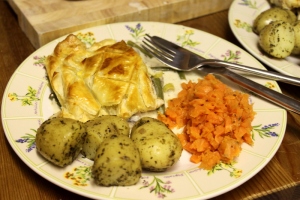
The pie basically included chicken, mushrooms, green beans, all smothered in a deliciously creamy mustard sauce.  Dammit, I want to eat it all over again!  Which is good, because we’re having it for leftovers tomorrow.  Yeeeah!

Look at the beautiful golden crust!

The next picture is of the crust.  This is the first time that I have been able to get it properly puffy and golden.  The trick is to let your pie filling cool (not totally cold, but not piping hot) before you place the pasty over top, otherwise you’ll find that your pastry ends up getting soggy and the heat will make the various puffy layers stick together.  I also used an egg wash this time, instead of a milk wash.  It gave the crust a better golden brown and added lovely crispy bits (mmm…).  Alas, I do not own a pastry brush though, even though I thought I did, so I had to improvise with my finger brush.

Awe! It even has little leaves on it - how quaint!

We had boiled potatoes with herbs and smashed carrots with our pie.  The carrots were meant to be just plain, but I was using old wonky carrots and they didn’t look so pretty once I cut them up.  The solution to that problem is always to roughly mash them.  I also added some thyme and olive oil…  which is known to make anything taste great!

Oh jeez, it looks SO delicious!

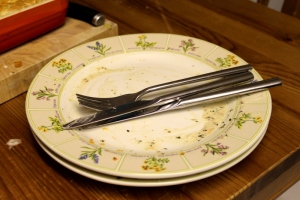
And then it was gone.  I have a feeling I’ll be making this pie again.  And again.  And again…

Yeah, that's right. Leaves and all!

If you want the recipe let me know and I’ll attempt to type up my manic kitchen process that ends in this result.  It is loosely based on three other pie recipes, so I am sure I can figure something coherent out.

What are the odds?

10 Nov

Numbers are important.  But so is understanding them.  I am going to be using a lot of statistical testing in the later stages of my PhD research project, and as a result I have been reading a lot about numbers lately.  I was always pretty good at maths, but I usually found it boring.  In school it was a lot of equations, without a whole lot of practical application.  I never really saw the point, beyond the basic every day uses.  Over the years though, I have learned to love numbers and maths (maths can be thought of as the language of numbers, which may be cheesy, but it can help you to think about their relationship, if you’re not a big maths person).  Oh, and if you’re reading this outside of the UK, I apologise for repeatedly using the term ‘maths’ instead of ‘math’, I know it is going to drive you insane, but it is actually accurate when using it as a shortened form of the plural noun (and even though grammar is also one of my big loves in life I had to be convinced of this).

Maths is waaay more than just equations and results.  If you know how to interpret the results (which means understanding both the data you use in an equation and what the equation is actually ‘doing’ to the numbers) then you can learn some pretty phenomenal things about a lot of subjects – and subjects that people do not normally associate maths with… it is not just for the Sheldons and the Leonards of the world.

I know that a lot of people are of the opinion that they do not understand mathematics.  They think they cannot possibly understand the data and that they will never understand the equations that scientists use in their research, which means that maths is pretty much useless for them beyond what they already know and use.  Wrong!  Everyone has the capability to understand mathematics and, more importantly, what it can teach us about the world.  Buuut (and there is always a but) it all comes down to how it is presented to you.  Because while everyone is capable of understanding maths, not everyone has been educated to understand maths in the form in which is is often presented (mainly dull formats), which is important for researchers to remember – especially if they want to the public to care about their results!

In the build up to talking about my own research, I thought that I would share an example of what I am talking about.  There is a blog post that you should read (or skim through, whatever) called: What are the chances of your coming into being?  It discusses the probability of you existing (as you) today.  Now, I’m not going to get into a debate about the fact that the actual probability of you existing is 1, because when discussing all known-to-have-happened events, the probability is always 1:1.  I know that is the case when talking about probability, but that is not really the point of this post.  And yes, Ali Binazir uses a lot of assumptions in his equations, therefore affecting the accuracy of the result, but what I want to look at here is how the whole thing is presented.  The blog post is really interesting, but it is more than a little bit dry, especially if you are not interested in maths.  You would be forgiving for not really caring about the results, especially if you gave up halfway through the blog post.  However, designer Sofya Yampolsky of Visual.ly created an infographic based on the blog post, which presents the exact same data (and includes a lot of information from the equations) to present the exact same results… only it is way more interesting.

The same thing, presented in a more engaging form is more useful, because more people are going to pay attention.  The same is true in science and academia.  If no one can understand your work, you can pretty much guarantee that they are not going to care about your results.

The only big problem I have with the blog post and the infographic?  “Now go forth and feel and act like the miracle that you are.”  It is not miracle (mir·a·cle/ˈmirikəl/  Noun:  1. A surprising and welcome event that is not explicable by natural and scientific laws and is considered to be divine.) it is maths.  Unless you are going to be incredibly pedantic, in which case feel free to respond in the comments with ‘it’s science’, ‘it’s evolution’, ‘it’s chance’, etc.  I know that no one I know is that pedantic though!  Ha!